This post will focus on how to add motion blur to animation in Adobe Premiere using the Transform effect.
Often times when working with video footage we face the need to add some simple transition animations to elements such as titles and slates. Keyframing Position or Video Transitions are some obvious ways to animate layers in Premiere however they lack the motion blur effect which adds a desirable realism to the movement.
Unlike Adobe After Effects there is no readily available option in Premiere to add a motion blur to the layer you want to animate. But there are some work arounds you can use. Here are some simple steps to apply motion blur to any animation in your Premier project.
Step 1
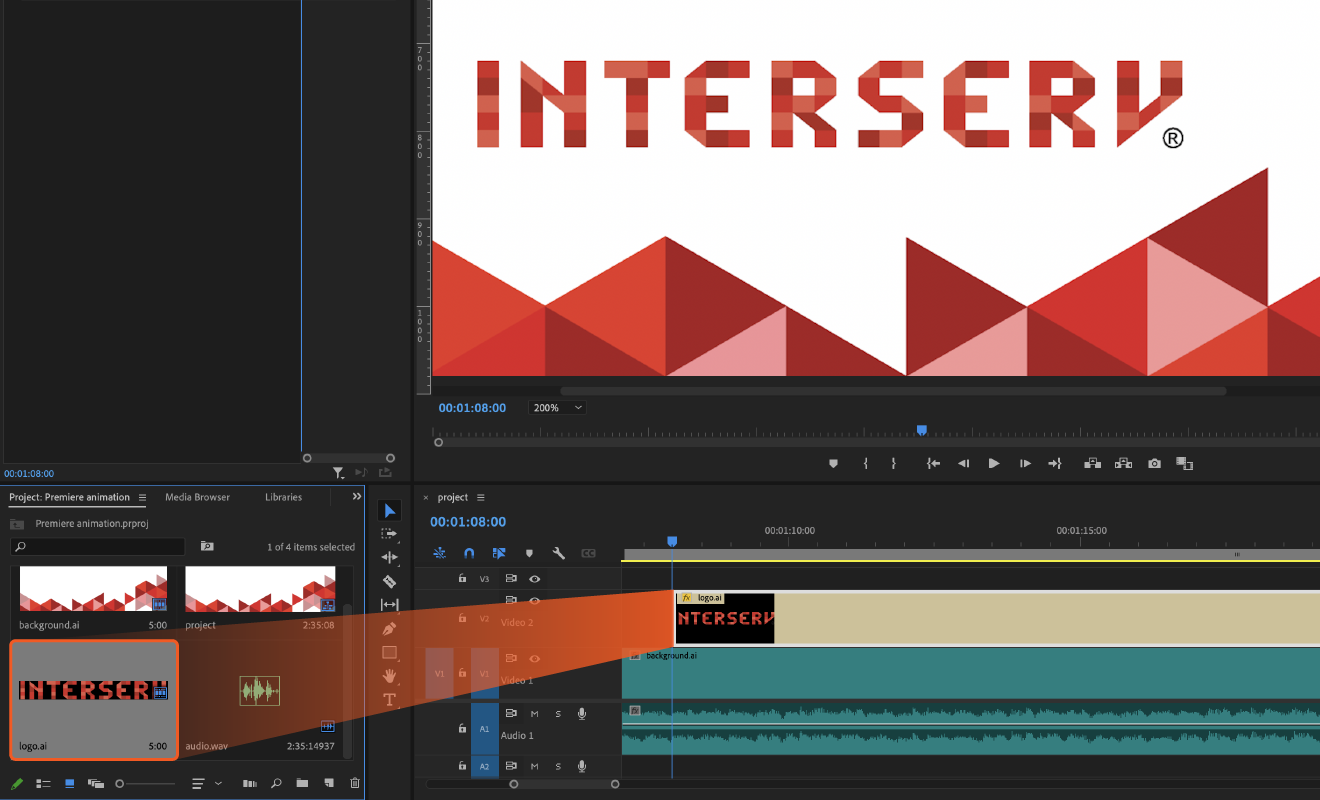
Decide what layer you'd love to animate in your sequence. In this example it would be a company logo.
Step 2
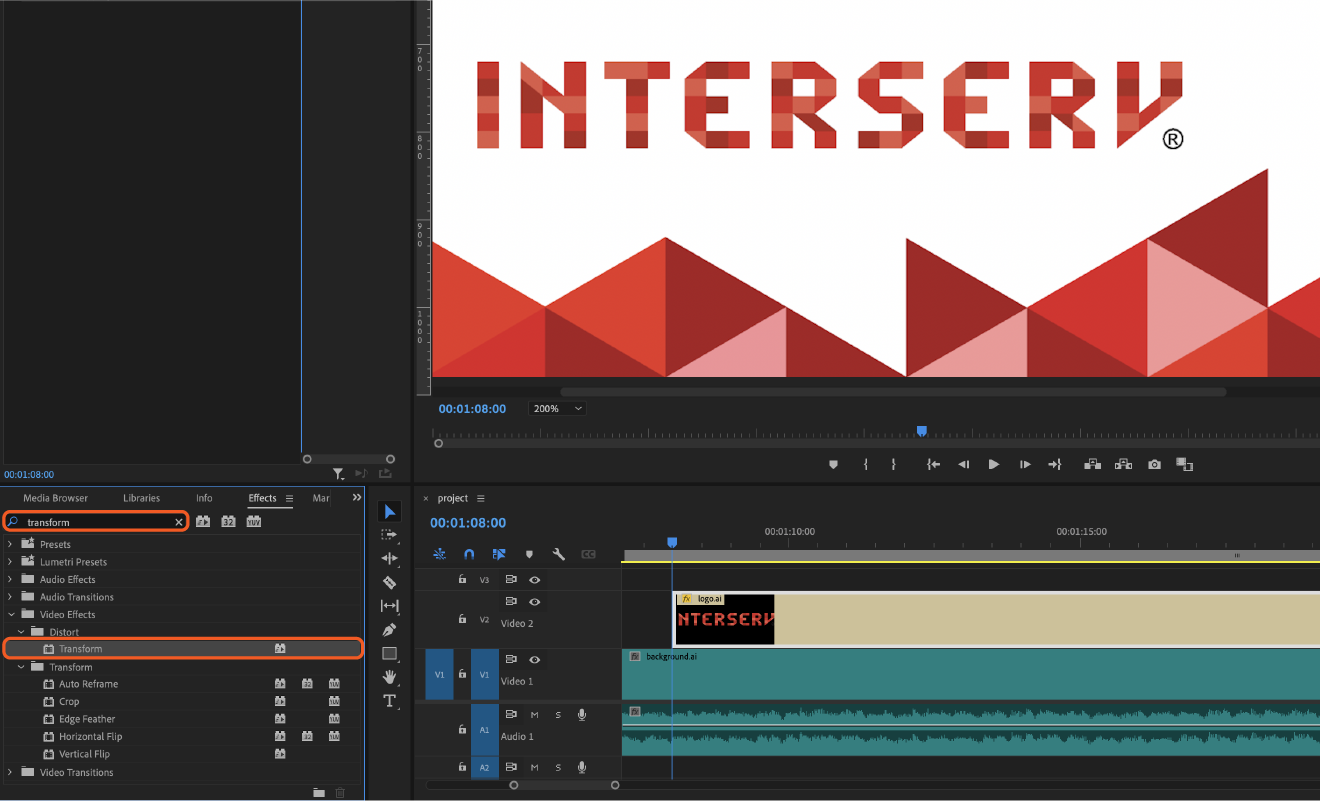
Navigate to Effects Panel at the left bottom of your editing workspace and search for 'Transform'. You will be able to see it in Video Effects/Distort folder.
Step 3
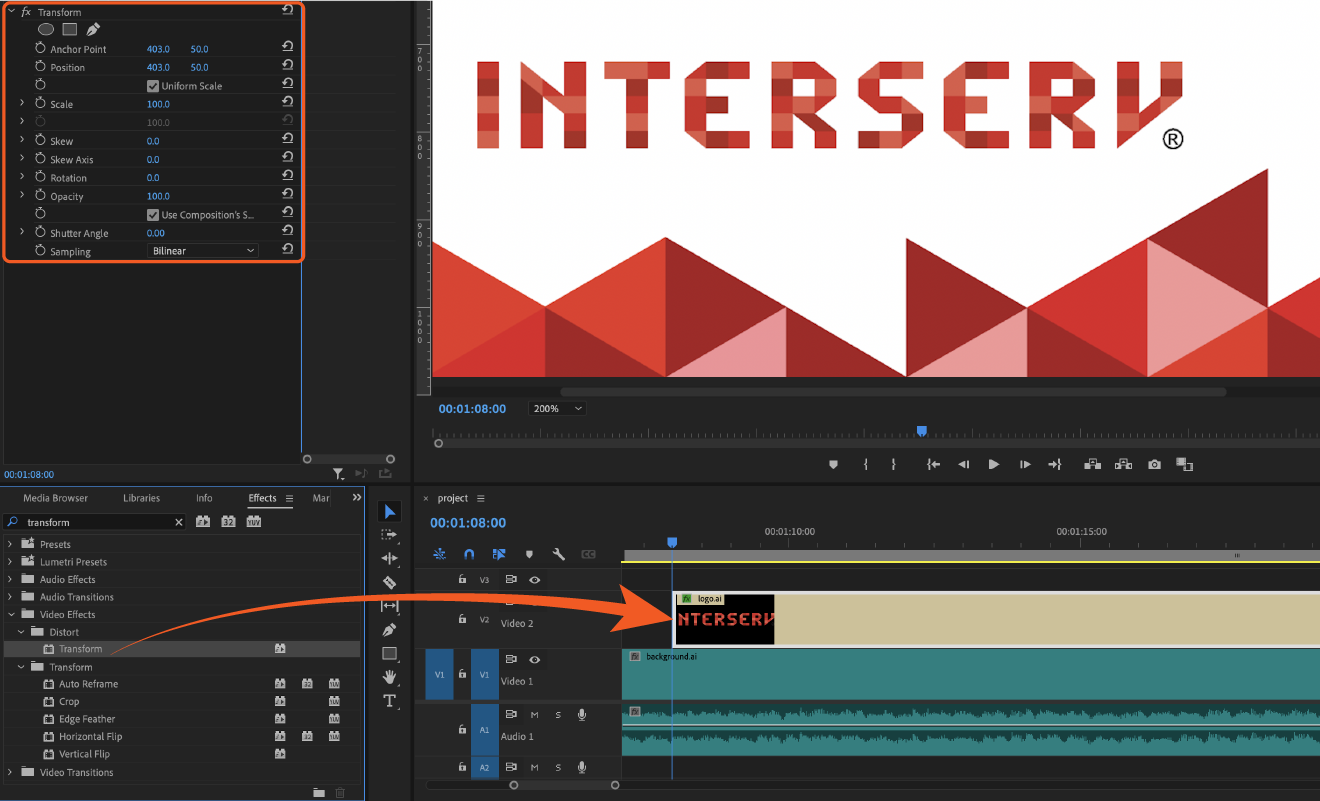
Click and drop effect on layer with graphics that need to be animated or double click on 'Transform' with layer selected.
Step 4
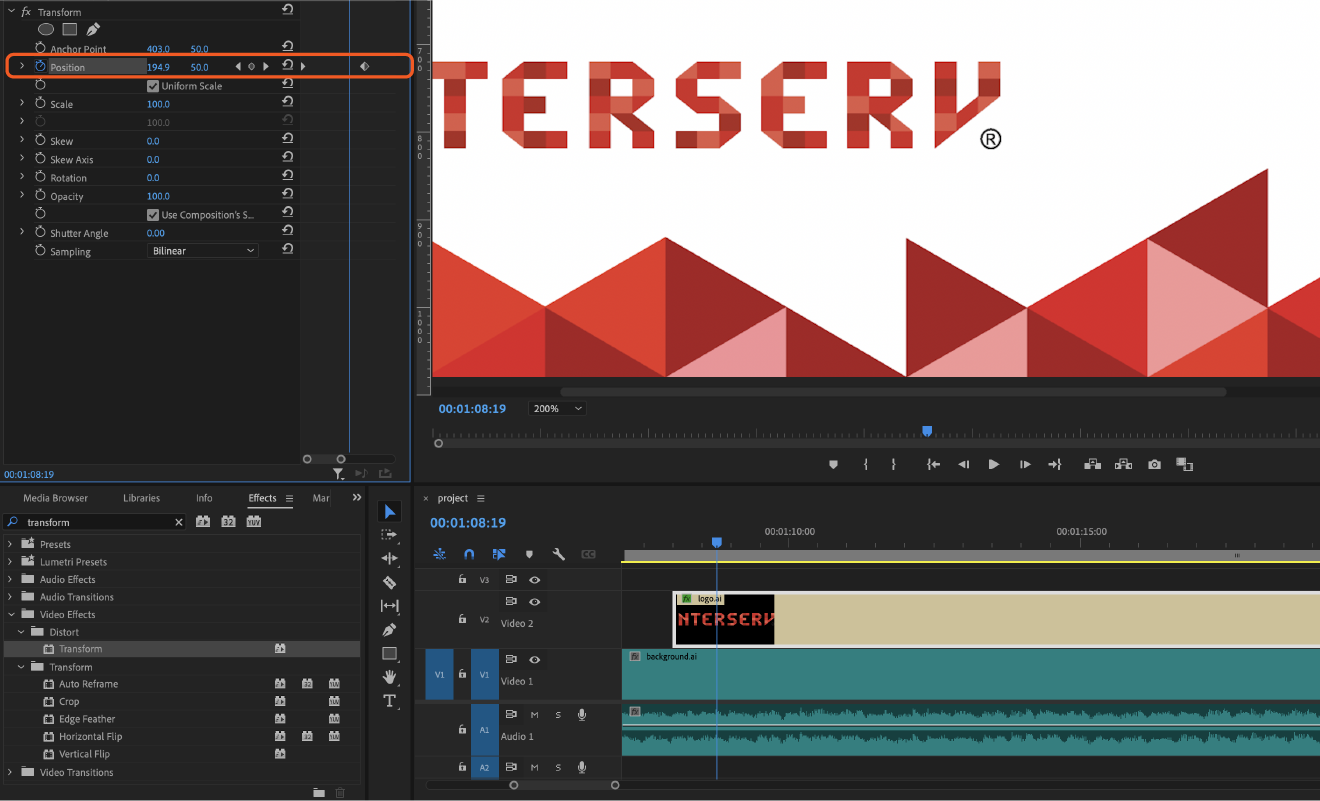
Use Transform effect section in Effect Controls Panel at the top left to keyframe movement. In our case to change the Position values.
Step 5
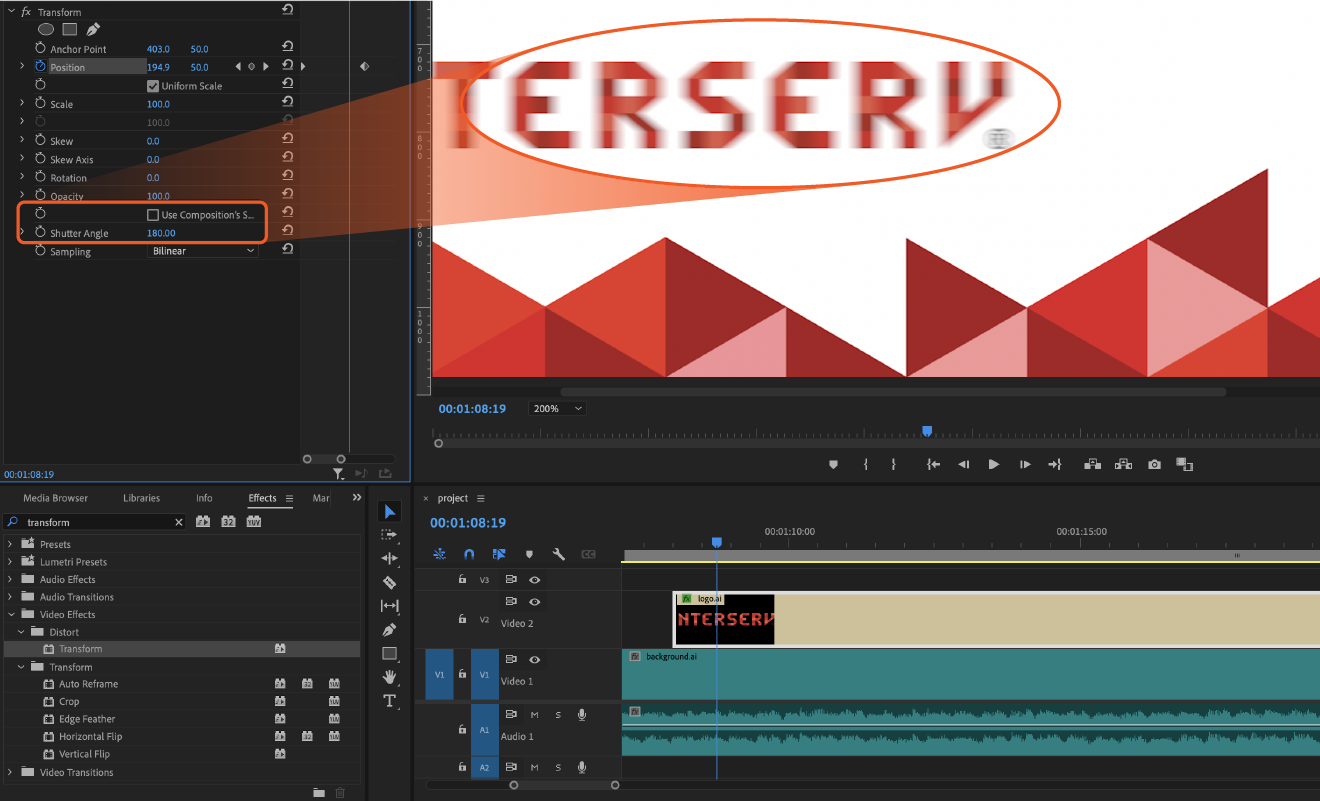
Use Composition’s Shutter Angle' box must be unchecked. Change Shutter Angle value to 180.00 which works great for horizontally moving objects. And voilà now we have it!
Use of Motion blur is a great way to enhance project animations. And this optional use of it directly in Adobe Premiere is very handy and time saving.
Prefer to watch the tutorial?
Watch the video below to see how all these steps work in practice.